Minimizing upward or downward skew in your sketchnotes
Posted: - Modified: | drawingWhen drawing without rules or grid lines, you might find your writing skew a little upwards or downwards. I tend to skew upwards, like the way I do in the image below:
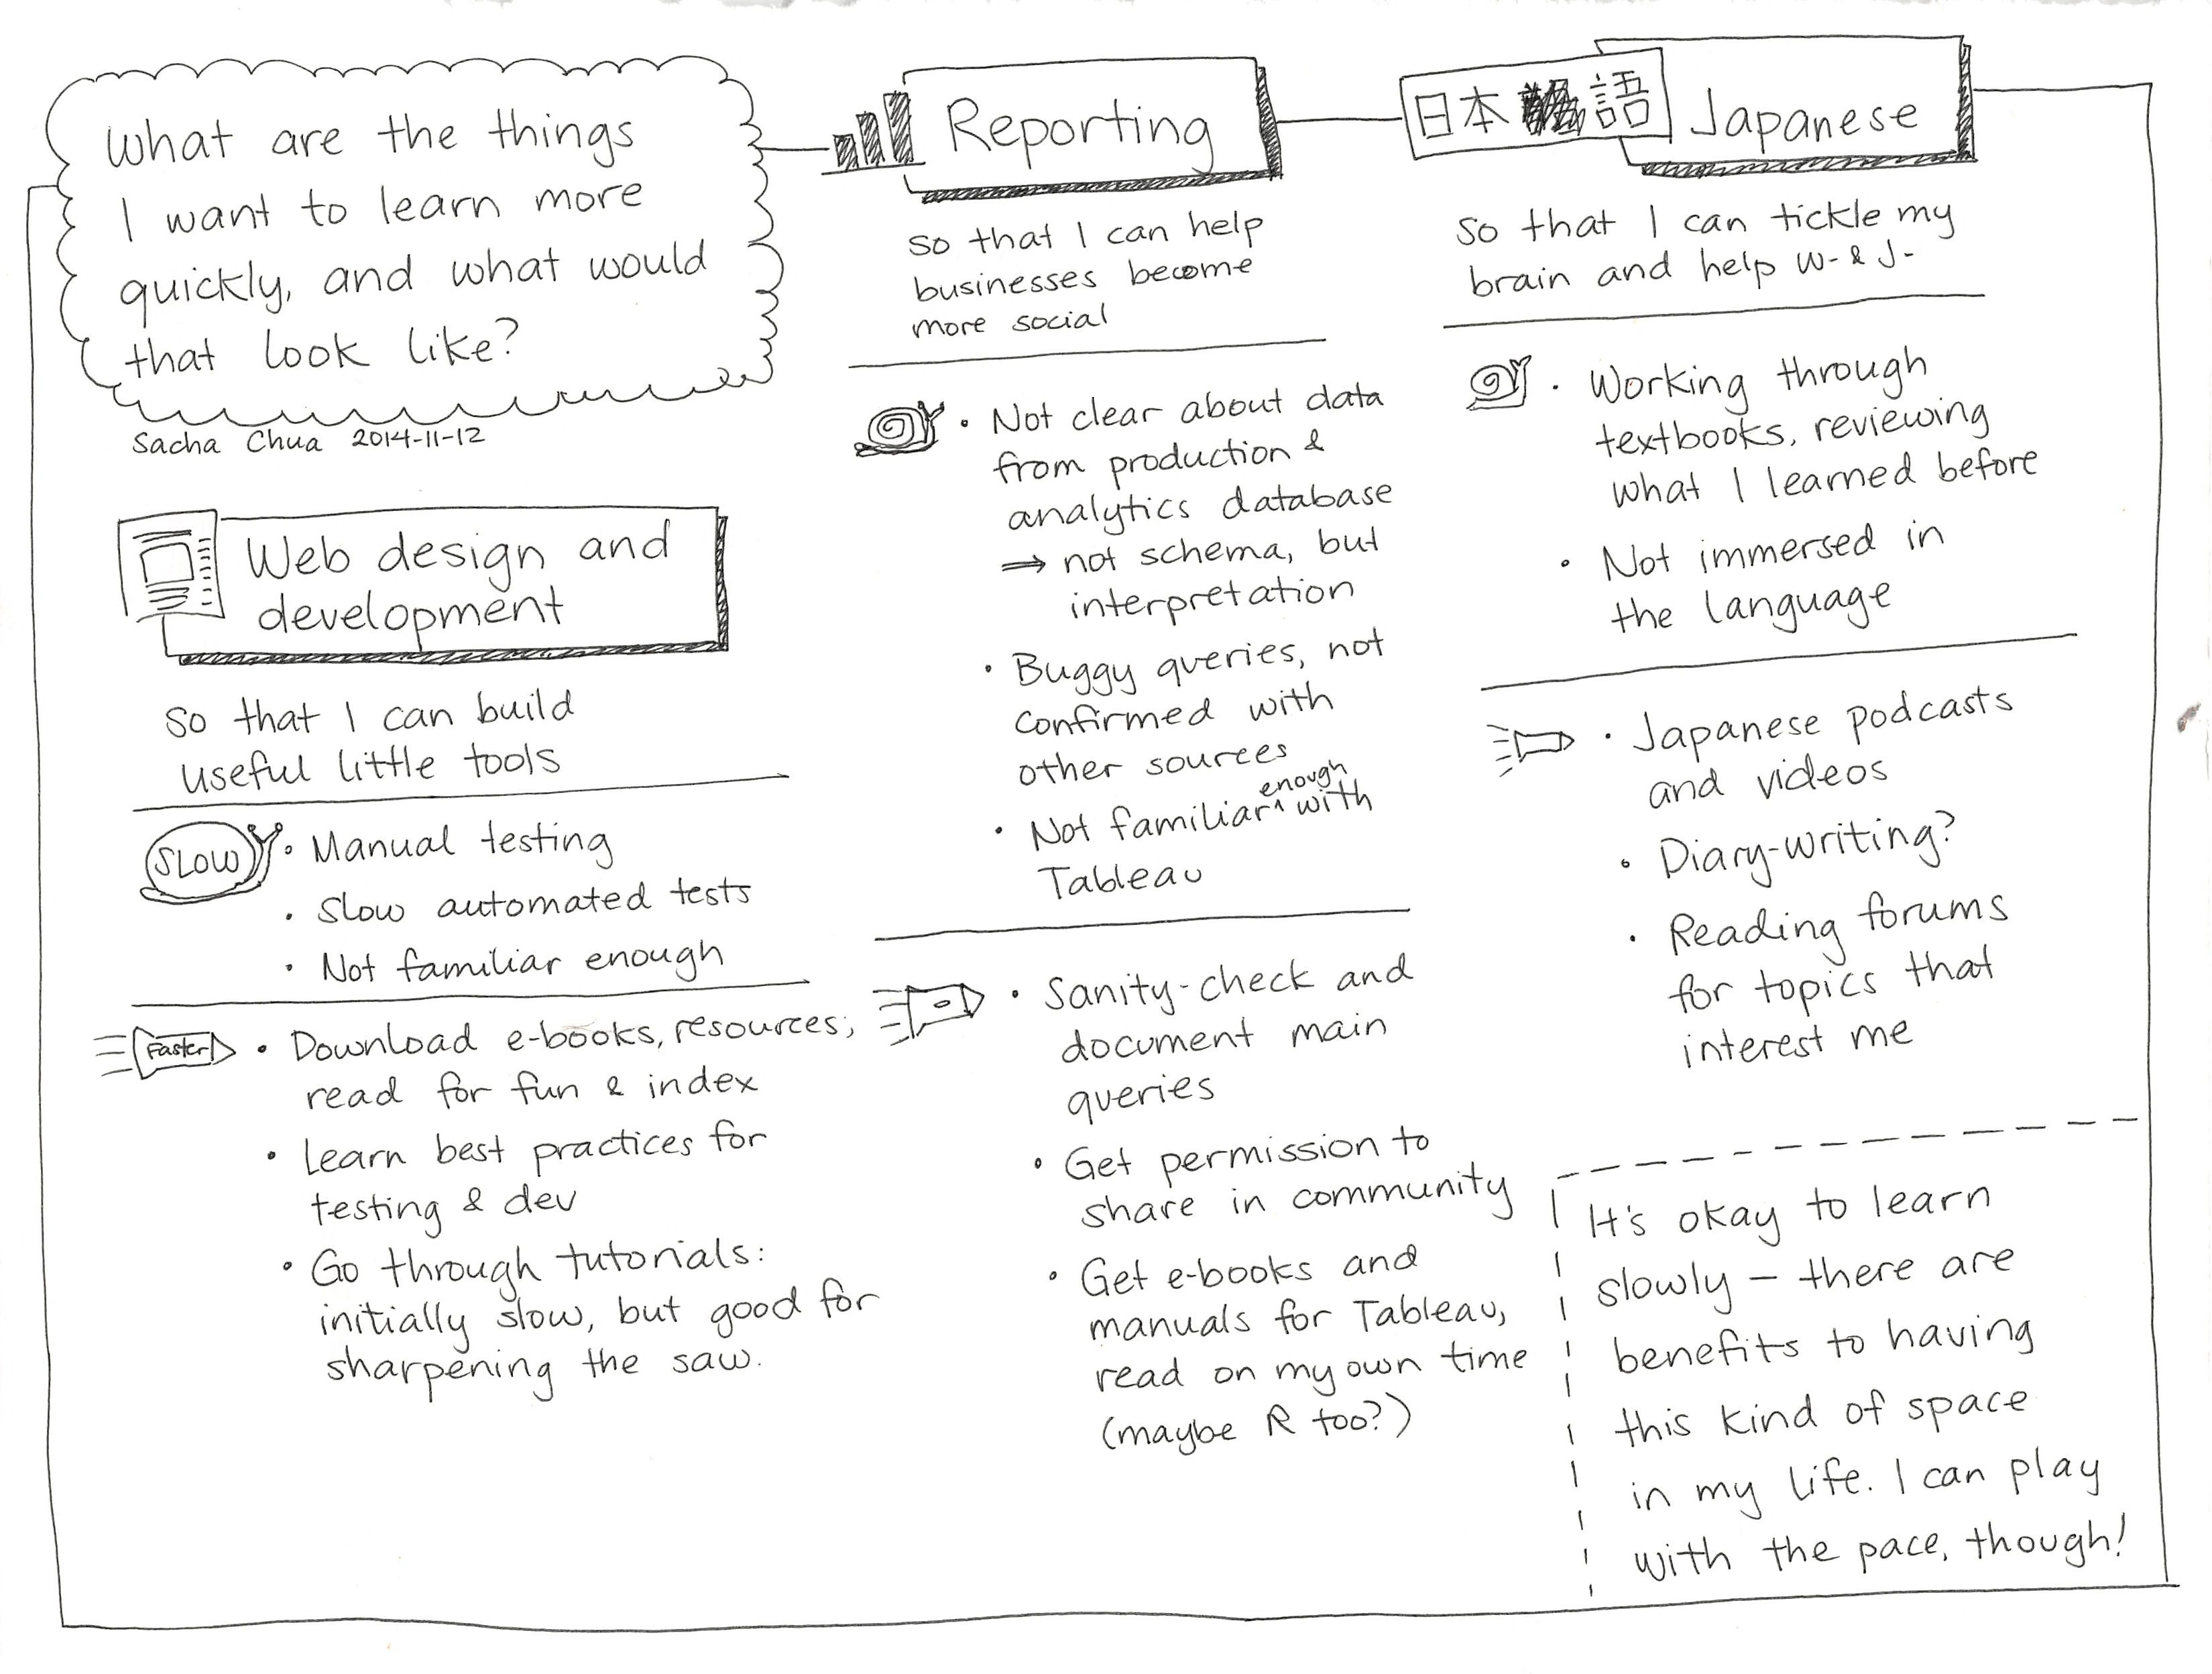
2014-11-12 What are the things I want to learn more quickly, and what would that look like?
Minimizing skew gives you a more polished sketchnote, and you don’t end up with awkward space at the upper right or bottom right corner. It’s usually better to correct for this while drawing, since rotating images can result in fuzziness or the need to move things around to fit.
Here are some general tips for minimizing skew.
In general, it helps if you write narrower columns of text, since skew becomes more noticeable the longer your lines get. If you write in narrow columns or with short phrases, you can correct for skew by making part of the next line a little larger.
If you want, you can also mix angles so that the variety is an intentional part of your design.
If you draw on small sheets of paper or in notebooks, you can:
- Rotate the paper so that it’s perpendicular to your usual writing angle. With experience, you’ll get a sense of how much you normally skew and how much you need to rotate what you’re drawing on in order to compensate for that.
- Look at the edges of the paper as a guide. If you write your first line while looking at the top edge of your paper, you might find it easier to keep that perpendicular to the edge. Then you can use that as the guide for the next line, and so on.
- Look at everything as a whole. Every so often, take a step back and look at your drawing in progress. This will help you spot skew, imbalance, and other things you can tweak while you’re drawing.
- Draw with a guide sheet underneath your paper. If your paper is thin enough, you might be able to see lines or grids printed on a sheet slipped underneath what you’re drawing on. If so, you can use it as an invisible guide.
- Consider using paper with very light grids or lines on it. You can leave the grid or lines as is, or you might be able to remove the grid or lines after scanning.
If you draw on large-scale rolls of paper, you can:
- Stand up straight and use your body as a guide. With practice, you can get the hang of drawing perpendicularly to your body. Good posture helps. Of course, when you tape up your paper, make sure that it’s parallel to the floor.
- Look at the top or bottom edge of the paper as a guide. Looking at a straight line while writing can help you write in a straight line too.
- Step back and look at everything. This is a good time to check for balance, skew, and other things you can fix while drawing.
If you draw on a tablet or on a computer, writing in straight lines is much easier. If your drawing program supports layers, you can use one layer to show a light grid while you draw on another layer. This also helps you keep your sizes consistent even if you’re working zoomed in. Lock your grid layer so that you don’t accidentally draw on it. I use a dot grid when sketching. You can download the template I use, if you want.
Hope that helps you minimize skew in your sketches!