Tags: language

RSS - Atom - Subscribe via email

Experimenting with adding labels to photos

Posted: - Modified: | geek, linux

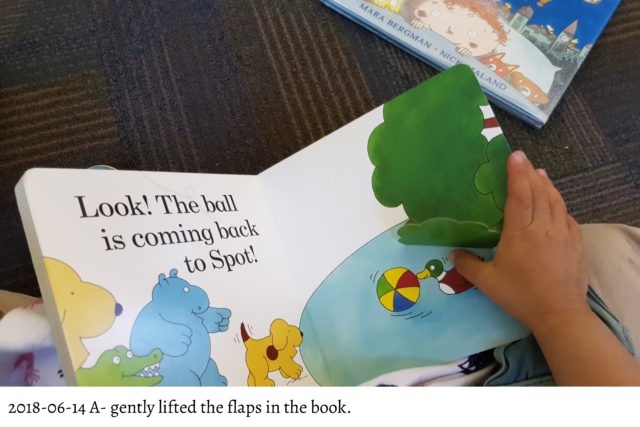
A-‘s gotten really interested in letters lately, so I'm looking for ways to add more personally relevant text and images to her life. She often flips through the 4″x6″ photos I got printed. Since they're photos, they're sturdier and can stand up to a little bending. I wanted to experiment with printing more pictures and labeling them with text, building on the script I used to label our toy storage bins. Here's a sample:

2018-06-14-16-12-14 β˜…β˜…β˜… A- gently lifted the flaps in the book. 🏷fine-motor

(Name still elided in the sample until I figure out what we want to do with names and stuff. I'll use NAME_REPLACEMENTS to put her name into the printed ones, though, since kids tend to learn how to read their names first.)

I haven't printed these out yet to see how legible they are, but a quick on-screen check looks promising.

prepare-for-printing:

#!/bin/bash

# Add label from ImageDescription EXIF tag to bottom of photo

destination=~/cloud/print
description_field=ImageDescription
font=Alegreya-Regular
SAVEIFS=$IFS
IFS=$(echo -en "\n\b")
border=50
output_width_inches=6
output_height_inches=4

# NAME_REPLACEMENTS is an environment variable that's a sed expression
# for any name replacements, like s/A-/Actual name goes here/g

for file in $*; do
  description=$(exiftool -s -s -s -$description_field "$file" \
     | sed "s/\"/\\\"/g;s/'/\\\'/g;$NAME_REPLACEMENTS")
  date=$(exiftool -s -s -s -DateTimeOriginal "$file" \
     | cut -c 1-10 | sed s/:/-/g)
  width=$(identify -format "%w" "$file")
  height=$(identify -format "%h" "$file")
  largest=$(( $width > $height ? $width : $height ))
  pointsize=12
  density=$(( $largest / $output_width_inches ))
  correct_height=$(( $output_height_inches * $density ))
  captionwidth=$(( $width - $border * 2 ))
  convert "$file" -density $density -units PixelsPerInch \
    -gravity North -extent ${width}x${correct_height} \
    -strip \( -undercolor white -background white \
    -fill black -font "$font" -bordercolor White \
    -gravity SouthWest -border $border -pointsize $pointsize \
    -size ${captionwidth}x  caption:"$date $description" \) \
    -composite "$destination/$file"
done
IFS=$SAVEIFS
gwenview $destination

Here's my current rename-based-on-exif, too. I modified it to use the ImageDescription or the UserComment field, and I switched to using Unicode stars and labels instead of # to minimize problems with exporting to HTML.

#!/bin/bash

date="\${DateTimeOriginal;s/[ :]/-/g}"
rating="\${Rating;s/([1-5])/'β˜…' x \$1/e}"
tags="\${Subject;s/^/🏷/;s/, / 🏷/g}"
field=FileName  # TestName for testing
exiftool -m -"$field<$date $rating \${ImageDescription} $tags.%e" \
         -"$field<$date $rating \${UserComment} $tags.%e" "$@"

In order to upload my fancy-shmancy Unicode-filenamed files, I also had to convert my WordPress database from utf8 to utf8mb4. This upgrade plugin was very helpful.

Learning sewing and French

| sewing

Sewing is turning out to be surprisingly fun. I finished the wool jumper-dress (Simplicity 4097), learning how to work with wool and lining. It’s amazing how even my not-quite-matched-up work looks better with a little bit of lining. In a burst of confidence, I wore my jumper outside the house yesterday. It didn’t fall apart on me (hooray!), and it made me smile. And I didn’t need to unpick nearly as many seams this time around. I think I only ripped out one mistake.

I’ve started working on a matching blazer. It’ll be my first time working with interfacing (to stiffen the jacket front), reverse facing, and sleeves. I’m a little nervous about the sleeves, but I’m sure I’ll figure them out. I’m half-way through the process and the blazer is looking pretty neat.

W- and I passed by a fabric place earlier. He picked up some black-and-beige cloth for reupholstering the dining room chairs, and I picked up 2 3/4 yards of 60″ red wool. I think I’ll make another jumper with a different neckline. =)

I’m starting to really enjoy carefully measuring and cutting the fabric because I know that the attention I put into the early stages will pay off later on. The boxes we bought from Ikea yesterday have also greatly helped me organize my sewing corner. I was planning to get a sewing machine cover just to make sure Leia doesn’t get tempted by the thread, but the universal sewing machine cover looks clunky. I may just have to sew a sewing machine cozy. ;)

When I told Stephen Perelgut about my new hobby, he laughed and joked about my having too much free time. That’s not really true. I could always find plenty of things to do. I can be using this time to draw, write, cook, exercise, code, tidy up, fiddle with things, play with the cat, read…

I’m glad I added sewing to the mix, though. I enjoy creating things. Sewing is teaching me more about thinking in three dimensions with different colors and textures. Constructing my own clothes teaches me about the techniques used in the clothes I wear and the clothes other people wear, developing my eye. I’m getting better at accurately following instructions, deviating from the pattern where necessary. I think it does me good. In fact, it’s so enjoyable that I’ve started setting limits on how much time I spend sewing at any one sitting. (Leia also helps me keep track of time. Yay for cuddly cats!)

I’ve also been doing French lessons in the background. Of course, since I’m learning from Pimsleur language CDs (hooray library!), the example dialogue’s like this: “Bonjour, madamoiselle. Est-ce que vous voudrais bois quelque chose chez moi?” Aiyah. It was like that for Pimsleur Cantonese, too.

Still, learning is lots of fun. =)