Making and re-making: fabric is tuition
| sewing, parenting, lifeSewing together with A+ is helping me learn so much about making and re-making, and about saying yes.
I'm not good at saying yes. Sometimes it's because I have no idea how to make something happen, and I don't want to overcommit. Sometimes it's because I don't think something will be practical or worthwhile. Sometimes it's because I want to spend the time or money on other things instead. Sometimes I don't know how to make it something that she can help with. But A+ asks with shining eyes, and I'm learning, slowly, slowly, to say yes. I'm beginning to trust that the mistakes don't matter as much as the memories do.

A+ has always had ideas about what she wants to wear. At five, she was all about floor-length dresses. I sewed her A-line dresses in comfortable cotton Lycra, peasant-style dresses that matched my tops. I also made a knee-length swim skirt for her. She liked it and requested a floor-length version so that she could twirl and twirl and twirl at the splash pad. She wore it into the wading pool too, enjoying how it swirled around her, trapping air under the skirt and marvelling as it ballooned. The following year, she asked me to attach a bodice to it to make it a dress. I turned the knee-length skirt into the bodice for the floor-length dress, took out the stitches that had previously narrowed the then-too-large waist, and it was good for another year of twirling.
When she was 6 and in the throes of a Cinderella obsession (we read through 50+ variants of the story from the library), I made her a powder blue charmeuse ballgown with a full-circle skirt supported by the petticoats and tutus that she layered with abandon: 19 layers of tulle in total. She loved curtsying and twirling with that whole shebang at the pretend tea parties she hosted at the playground, and it survived the washing machine surprisingly well.
A+ is nine now and has long outgrown the ballgown, which has been stashed in the closet until I figure out if it's going to become a skirt for her or for me. But she still wears the A-line dresses from years ago, which now reach her knees instead of her ankles. She still likes fanciful clothes. I made a floor-length light blue dress so that she could wear it to her cousin's wedding. She picked out some ribbon for the waist, a lace trim to place near the hem, and some ribbon flowers as embellishments, and she asked me to sew a hooded cloak with a ribbon closure. After the wedding, I trimmed the dress to knee-length and re-sewed the lace close to the new hem so that she could wear it while biking to the playground.
Inevitably, she's beginning to grow up. Her fancy is tempered by a few nods to practicality:
- knee-length skirts because they don't get in the way of riding her bike
- she likes stretchy fabric more than woven fabric
- skorts are great for doing cartwheels or hanging upside down.
We prefer to buy fabric in person so that she can feel the fabric on her skin. At the store, A+ zeroed in on a sheer floral print organza that she had seen on a mannequin in the window display. "The organza doesn't have a border," she said. "We can make it a circle skort." She's learning to think about the characteristics of the fabric and what we can do with it. She matched the sheer floral organza fabric with a peach polyester-spandex from the swimwear section and the right colour of thread from the basement.
This will be the fourth warm-weather skirt this year. We make little tweaks each time, as she learns more about what she likes to wear. Here's the progression so far:
- For her first summer skirt this year, I made a lavender knee-length rectangle skirt with scallop-edged embroidered mesh over bridal satin, gathered at a 1:2 ratio. She liked the dressiness of it, but 1:2 turned out to not be enough ease for cartwheels, so she changes into something else when she wants to be more active.
- The second was a mermaid scale skort made from the swimwear fabric I ordered last year, based on one of the purchased skorts she liked. It'll be her new swim skirt.
- The third one was a purple skort. I changed it from side seams to a single back seam so that it's easier for A+ to tell the difference between front and back.

I love being able to change things based on her feedback. We've browsed nearby clothing stores and bought a few pieces, but she rarely finds things that she really likes. Her last pick from the store was a peach skort with a matching top. I removed the waist elastic from the top because she doesn't like elastics, and now it's good to go. It'll be the model for the new skort, I think: a non-stretchy skirt with a stretchy fabric used for the shorts. This time she wants a knee-length circle skirt instead of the mid-thigh length of the commercial skorts. Easy enough - just a matter of drawing a bigger circle.

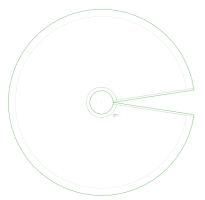
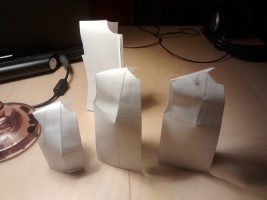
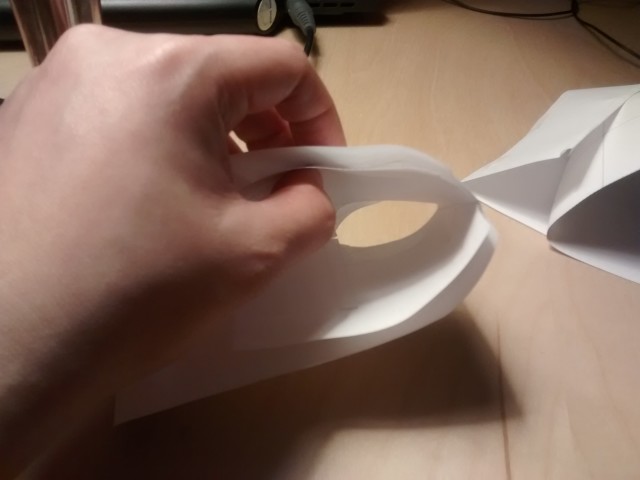
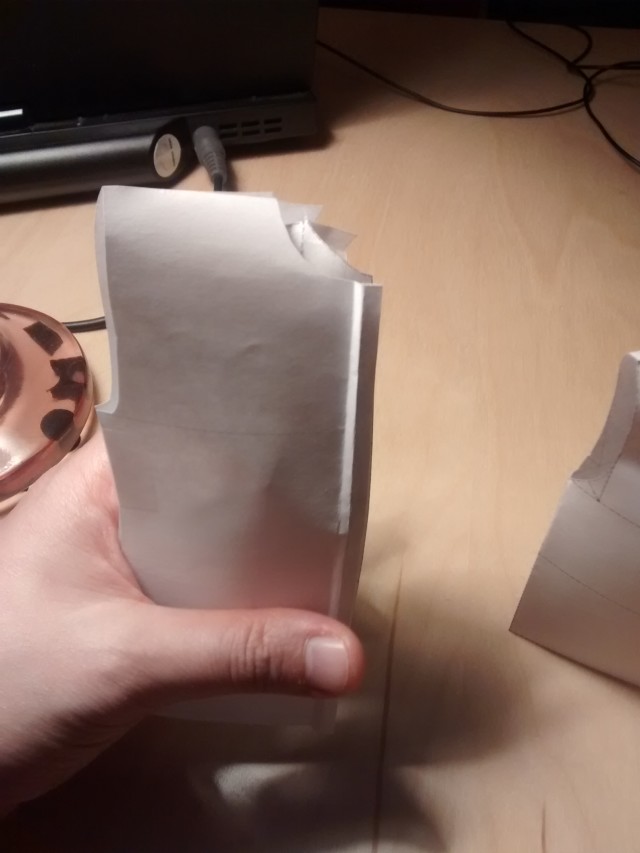
I appreciate how all this experience re-making things makes it easier to say yes to A+'s ideas. For example, the hat I sewed for her last year is starting to feel a bit small. I cut pieces for a new bucket hat using the free AppleGreen Cottage pattern that I'd previously used to make two other hats for her and one for me. This time, I wanted to make the outer layer from the floral canvas left over from reupholstering long-gone dining room chairs and the inner layer from the linen tea toweling that we decided not to use in the kitchen. Midway through the process, A+ asked me if I could make the hat pointy instead, like a witch's hat. I put the brim pieces together, sketched out a quick quarter-circle, sewed the outer layer, and tested the fit on her head. Then I used the inner brim layer to cover up the seams, finished with some topstitching, and it was good to go. I figured that if she changed her mind and wanted a flat hat, I could easily make one from the scraps, or I could even modify this pointy hat to put a different crown on it.

Sewing is becoming more enjoyable and less stressful. I worry less about making mistakes because I've learned how to recover from many of them. Sometimes something's more of a loss, like that lavender floor-length cotton dress with a split organza overskirt that she wore a couple of times before it was declared too uncomfortable, or the scraps that she cuts up when trying to fashion a dress for her doll. That's fine, fabric is tuition for learning.
A+'s becoming more adept, too. She's no longer limited to standing still for measurements, fetching pieces of fabric, or other make-work I could think of to keep her busy while I sewed. Now she can get the sewing machine to wind the bobbin and she can thread the needle. She can sew straight seams and stop when the machine makes an unexpected sound. She can turn straps right side out and unpick seams when we make mistakes or change our minds. She knows it isn't just a matter of how a fabric looks, but also what it feels like and how it moves. She's gradually learning what she likes and what she doesn't like. And if I have the temerity to remind her how to do something ("Make a 'p' shape with the thread when you put it in the bobbin case"), I get a glimpse of the teenager she'll become ("I know how to do it, Mom.").
We're getting better at seeing the clothes as their component parts: patterns, fabric, pieces we can recombine. "Can you copy this, but without sleeves?" she asks, and I figure it out. Looking at the yardage left, I can start to think: ah, I can squeeze a matching training bra out of this part, and I think I have enough here to make a top, and this rectangle is large enough for a headband, and I can turn these scraps into flowers while I'm waiting for her at a playdate.
I'm learning from all her requests. By myself, I tend to settle into comfortable routines. In 2015, I made 18 tops based on the Colette Sorbetto woven tank top pattern, eventually taking advantage of Hacklab's laser cutter to precisely cut the fabric so that my notches lined up every time. When I find something I like, I make it again and again. A+'s still figuring out what she likes. We're learning so much.
Sewing for A+ is a time-limited opportunity, and I want to make the most of it. There are only so many clothes I can sew for her. Eventually she may want to wear the same things as everyone else, or eventually she might be comfortable doing all the sewing herself. Eventually she'll be off on her own life. Maybe the ballgowns will turn into skirts or camisoles, and from there into headbands or scrunchies.
・・・・・
Re-making echoes through our past. My mom tells me this story of how her mom sewed, and how their family was poor. My mom rarely got a new dress, so when her mom sewed a red dress for her, that was special. She wore it until the bodice couldn't fit any more. Her mom undid the seams, sewed a new bodice onto the skirt, and gave the dress back to her. She wore it until the skirt was all worn out. Her mom undid the seams and replaced the skirt. My mom said to her mom, "Does this mean I have a new dress now?" This was not the only dress my grandmother made for her. My mom also tells a story of how one time she hovered by her mom's sewing machine, impatiently waiting for her mom to finish sewing the dress that she was going to wear to a party that day. My grandmother must have also worked on re-making, on learning how to say yes. My mom didn't make clothes for me, but she passed on the stories.
All this reminds me a little of two picture books we borrowed from the library. My Forever Dress by Harriet Ziefurt and Liz Murphy (2009, video) shows how a grandmother extended and transformed a dress as her granddaughter grew. Something from Nothing by Phoebe Gilman (1992, video) retells the Yiddish folktale about Joseph's overcoat, this time with a special blanket that gets worn down and transformed into a jacket, a vest, a tie, a handkerchief, ending as a fabric-covered button. The button gets lost, but it turns into a story. Of the two, I liked Something from Nothing more. I liked the lighter touch it told the story with, and I liked the reminder that cherished things can be turned into stories.

A+ was in the kitchen, making a grocery list on an LCD writing tablet. She wanted to buy apple sauce, yogurt cups, and mac and cheese. She wanted to do it herself, with her own money. W- will walk her to the store, let her loose, and meet up with her in front of one of the aisles. "Mama, you can stay home," she said.
Challenge: She wanted her own bag for groceries. Her backpack was too small. I rummaged through the reusable bags hanging on the coat hooks. There's this cotton tote we got from an event, but the straps are too long. When she put it on her shoulder, it threatened to fall down. When she carried the bag by its straps, the bag dragged on the floor. I shortened one strap to see if she can hold it then. The body of the bag itself was too long. I sewed a seam across the bottom. Now it's the right height for her. I shortened the other strap and serged the bottom seam to make it neat. She wanted a pocket for her purse and the KN95 mask that she'll wear in the supermarket. W- was almost ready to head out. "Give me another five minutes and I can make her a pocketed bag," I said. He waited. I opened up the scrap from the bottom, sewed the edges together in the other direction, turned it into a pocket, and sewed it to the top hem of the bag. A+ pronounced it perfect. She tucked her purse, mask, and shopping list into the bag, looped the straps over her shoulder, snugged the bag under her elbow, and headed out into the world.
・・・・・
I still sweat my way through figuring out how to sew what she comes up with, but it's good for me. I make and re-make so she can have things that fit her ideas, and so that she can dream of more. She's learning that her ideas matter. It can take several tries, but we can make them happen together. Someday she'll make and re-make things all on her own.
This post was inspired by the June IndieWeb Carnival theme of Take Two.
 The
The