Tags: baking

RSS - Atom - Subscribe via email

Cake was not a lie

Posted: - Modified: | cooking


Cucumber sandwiches. Chocolate cake. Burgers. Poutine. Free-flowing conversations that bring out all sorts of awesome things I didn’t know about my friends. Mmm.

Cucumber sandwiches, roughly based on this cooks.com recipe:

  • Peel 2 medium-sized cucumbers (or 1 large cucumber) and remove the seeds. Grate it.
  • Mix the cucumber with 1 tsp salt. Put it in a strainer, put the strainer in a bowl, and keep it in the fridge for at least 1 hour.
  • Mix a softened 8-oz package of cream cheese, 1/2 tsp Worcestershire sauce, and 1/2 tsp garlic salt.
  • Stir cucumber into the cream cheese mix. Spread on buttered bread.
  • Refrigerate until ready to serve.

The chocolate cake was roughly based on the Portal recipe, except I was out of whipped cream, so I didn’t do the white dollops with cherries on top, or the candle. So it was really more like Black Forest cake. 

I always stress out in the lead-up to these get-togethers. Is the house reasonably clean? (“I promise, this kitchen was clean-ish before I started frosting this cake…”) But then people come, and the conversation gets going, and it’s awesome.

Catching a break before I clean up the kitchen. Happy.

Strawberry rhubarb baking

Posted: - Modified: | cooking

Okay, I was wrong. I guess it’s baking season all year round.

The strawberries from the garden are lovely, red and firm. I’ve baked strawberry shortcakes before, so I thought I’d give strawberry rhubarb tarts a try. Rhubarb is available so rarely – all the more reason to experiment. (I think we’ll plant it next spring!)

Recipe from Joy of Baking:

  • 454g / 1lb sliced rhubarb – the recipe called for 1″ pieces, but I had big chunky field rhubarb, so 0.5″ slices might be better
  • 454g / 1lb sliced strawberries – this one’s a mix of garden strawberries and local strawberries
  • 1/4 cup (35g) all-purpose flour
  • 3/4 cup (150g) white sugar

Mix all ingredients. Fill purchased tart shells or home-made pastry circles (see original recipe). Chill assembled tarts for 15-30 minutes in the fridge. Preheat oven to 400F (200C), with the rack in the center of the oven. Bake for 25-30 minutes until crust is golden. Cool on a wire rack before serving. (The original recipe suggests serving with whipped cream or iced cream, ooh.)

Strawberries from the gardenTart with purchased shellsStrawberry and rhubarb homestyle tart

I liked spending my Saturday afternoon baking, trying out new recipes. It’s a little like going to a cooking class, except much cheaper. =) I shared some tarts with neighbours so that we wouldn’t have too much dessert in the house. (Particularly as we’re still planning to bake brownies too…)

Recipes: Coconut cocktail bun recipe

Posted: - Modified: | cooking, cookordie

As it turns out, ingredient lists are uncopyrightable, so I’ll try to post more of them when I write about our cooking adventures. (I’ve come quite a long way from the beginnings of Cook or Die!) Recipe steps might be copyrighted, particularly those that are creatively expressed, but that should be no problem – I’ll just write my own instructions.

So here are the buns that have just come out of our oven. (Yes, another set of buns. The ones I made just two days ago have vanished. There must be a bun-monster somewhere in the basement…)

After the success of this weekend’s coconut cocktail buns (gai mei bao), W- and J- suggested hotdog bao, Nutella bao, and some more coconut bao to use up the extra filling we had. Result:

Assorted buns

You will need a kitchen scale. This is actually good, because volume measurements of flour and other things can vary widely.

Gai Mei Bao – Chinese Cocktail Buns and flexible bun dough recipe
Adapted from David Ko’s Yung Sing Dim Sum Recipes (A Chinese Snackbook):

Bun Dough

David Ko uses this recipe for practically all the buns in his book. It’s a white, slightly sweet bread.

  • 12g active dry yeast
  • 495ml warm water
    • Dissolve yeast in water.
  • 340g sifted all-purpose flour
    • In a large mixing bowl, pour yeast solution into flour. The original recipe says to knead the result for 5 minutes, but this paste results in more of a liquid mix, so just mix it until it’s smooth.
    • Leave in a warm place for 2 hours. Or if you’re like us and baking season (winter) doesn’t leave you with an abundance of warm spots in the house, set the oven to 150’F for thirty seconds, then turn the oven off. Put the yeast mix into the oven and wait until it doubles in volume (around one hour).
  • 60ml warm water
  • 1 egg
  • 225g cake and pastry flour (sifted)
  • 560g all-purpose flour (sifted)
  • 110g sugar
  • 18g salt
  • 125ml milk
  • 3g lard
  • 3g butter
    • Mix all of the above with the yeast mix in a large mixing bowl. Knead until smooth and elastic, adding flour as necessary. Cover with a damp cloth (or cling wrap and a damp cloth; keeps your tea towels cleaner) and leave in a warm place for 2 hours, or until doubled in volume. You can use the oven trick here, too.

Coconut filling

  • 175g coconut flakes
  • 168g sugar
  • 56g melted butter
  • 1 egg
  • 30ml (2 tbsp) milk
  • 1 tsp vanilla extract (fun to make at home!)
  • 1/2 tsp baking powder
  • a few drops of coconut essence (optional; we didn’t have it in our pantry)
    • Mix well and put in the fridge.

We skipped the toppings because the regular coconut filling is awesome enough.

Assembly

  • Divide the dough into 24 portions. I tend to do this by cutting the dough in half three times, then cutting the resulting eight pieces into three pieces each.
  • Roll each portion of dough into a round ball. Arrange on a baking sheet, then cover and put in a warm place for 15 minutes.
  • Flatten the dough balls. I like using a rolling pin here for a nice, even look, although it does take more time than squishing the dough manually.
  • Spoon your filling into each flat piece of dough, wrap it up, and roll it into the shape you like. Try to make sure the buns are pinched closed, as the filling might leak out during baking.
  • Set buns aside in a warm place to rise further, covering the buns with a damp cloth or cling wrap. Preheat oven to 375F.
  • Do an egg wash or another wash if you want. Brushing the buns with a beaten egg (egg wash) gives them a beautiful golden colour, and also makes it easier for sprinkled things (seeds, etc.) to stick.
  • Bake buns in a 375F oven for 15 minutes, or until the buns are golden brown.
  • You can brush the freshly-baked buns with melted butter, if you want, but we skipped that step.

Other fillings we’ve tried:

Hotdog
Wrap the flattened dough around a hotdog. Brush dough with beaten egg and sprinkle sesame seeds on top. You can push the sesame seeds into the dough slightly to help them stick.
Nutella
Spoon Nutella hazelnut spread into the middle of the flattened dough and roll it up. Brush dough with beaten egg and sprinkle almond slices on top.

2011-03-14 Mon 23:14

Coconut buns and the economics of home awesomeness

Posted: - Modified: | cooking, family, life, love, reflection

Sometimes making things at home is cheaper than buying them. Sometimes it’s more expensive. For example, the batch lunches we prepare and freeze come out to $1-$3 per meal, labour included. They’re definitely worth it compared to eating out. The coconut cocktail buns (pan de coco?) I spent this weekend learning are cheaper at the store, but they were still very much worth making.

We followed a recipe from an book that W- had bought from a pastry store in Chinatown a long time ago. It was a different way of making dough. The first step was to mix yeast, warm water, and flour. I was a little nervous in the beginning because it was more of a slurry than a paste. Once it rose and I combined it with the rest of the flour, it was beautifully dough-like, made smooth and elastic through kneading. After several rounds of rising, I filled it with the coconut mix, wrapped the dough around it, let it rest some more, then popped it into the oven for 15 minutes. The result:

Coconut cocktail buns

The buns were scrumptious. Not too sweet. Complex taste. Yummy yummy yummy.

I had a lot of fun making the buns with W-, playing around with the voice and mannerisms we’d picked up from a Julia Child video. I also made some pie crusts for Pi Day (March 14). W- filled the first pie crust with lemon meringue. I sewed up some tea towels from the fabric that W- helped me pick out, and those passed their field test. We salvaged some wool scraps from one of my bins and repurposed an empty paper salt shaker into a dice roller for J-‘s math study sessions. It was a great weekend for maing things.

We spend a lot of weekend time doing things ourselves: cooking, baking, sewing, fixing things, even woodworking during the summer months. Some of things cost us more in terms of time and money than we might spend on functionally equivalent alternatives, but we get a surprising amount of value from these activities. For example, baking coconut buns results in yummy coconut buns (for which a reasonable equivalent can be bought for a little more than a dollar each), but the activity is also:

  • intrinsically enjoyable for us
  • a way to develop skills
  • shared relationship time
  • an opportunity to create or build on in-jokes
  • an opportunity to strengthen other relationships (friends, neighbours)
  • a way to reinforce and express our shared values
  • a good reason for a blog post =)

So although baking buns takes time, it actually pays off better than many of the other ways I could spend weekend time, such as:

  • reading
  • watching movies (borrowed from the library, but still passive)
  • programming or working (important to invest time into relationships; doing well in programming and working at the moment, I think.)
  • writing, even

There’s a reasonable limit to how much time I would spend on baking or making other things at home. I don’t want to mill my own flour (just yet). I think I’ve got a decent balance right now, and I look forward to picking up more as I get better and more efficient.

Am I trading off, say, more brilliance at work, or racking up income through side-hustles, or becoming more famous through writing? Maybe. But this is good, and all of those other aspects of life are pretty okay (even awesome!). Life is good.

Bread of salt and taste of home

Posted: - Modified: | cooking, cookordie, philippines, sketches

image

Pandesal. Brown paper bags of crunchy-yet-soft buns at breakfast and merienda, often accompanied by hot chocolate—or chocolate porridge, if I was really lucky.

If there is a type of bread in my heart, it is this. Not white bread or whole wheat or rye or flax. Not the focaccia we dipped into balsamic vinegar and olive oil at the Italian restaurant my family often went to. Not the banana breads or cornbreads W- and I have made.

Pan de sal. Bread of salt. 

Perhaps Laura Esquivel was on to something in Like Water for Chocolate. Food really is a language powerful beyond words.

I made pandesal for the first time. Fresh from the oven, they tasted of home.

I offered W- a piece. He had pandesal during our trips to the Philippines. I was glad he could relate to my memories.

There are places that sell pandesal in Toronto. I’ve never been to them. It’s different. Going out of my way to buy Filipino food? That’s something I might do if I get really homesick. Learning how to make the food of my memories? That fits. That helps me grow.

Now I can have pandesal any time I want. =) When we finish the 14 rolls I stashed in the freezer, I’m going to try this other recipe.

image

Picture by W-

Experiments in awesome

| cooking, cookordie, life, reflection

image

The long weekend gave us plenty of opportunities to pursue projects. W- set up his new negative scanner and hired J- to scan her baby pictures. He also roasted the turkey we’d stashed in the freezer last Christmas, and I helped prepare other meals for this week. I sewed a shopping bag using floral canvas and blue bias tape, made chicken pot pie from scratch (including the pie crust!), and experimented with making these delightful mini apple pies using honey crisp apples. The pie crusts I made using the food processor turned out nice and flaky. By golly, I think I’m getting the hang of it.

Sometimes I wonder if I should spend my unstructured time building something that scalably creates value instead of developing skills that focus on our immediate, local experience. There’s always more to write, more to code, more to explore. Why spend time, money, and energy learning how to make things that can be easily and cheaply bought?

But I enjoy making things, and I love experimenting with making things that suit our lives. I’m working on the hobbies I’d like to enjoy in ten years.

Geek cooking: In search of vanilla

Posted: - Modified: | cookordie

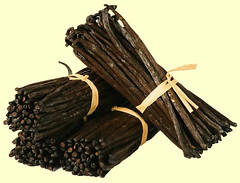
Vanilla beans

Winter is a great time for baked goods. Or as we like to call them in this household, baked awesomes. Baked awesomes usually involve a splash of vanilla extract. Our supplies are dwindling. The 500ml bottle of Posa pure vanilla extract that W- brought back from Mexico a number of years ago is down to maybe four batches of cookies’ worth.

W- and J- are maple syrup snobs (nothing but pure maple syrup, and even then, only particular kinds!), and I suspect we’re all that way about our vanilla extract, too. so I’m not even going to try to suggest the artificial vanilla extract readily available in supermarkets. Besides, I think it’s awesome that W- had a 500ml bottle of pure vanilla extract in his kitchen when most supermarkets only sell these tiny little bottles of vanilla (and fake, at that!).

So W- was searching the Net for a good place to order pure vanilla extract, preferably from Mexico. Turns out this is a dicey proposition because a number of companies add coumarin to bottles of vanilla extract (Wikipedia:coumarin). It’s cheap and it tastes like vanilla. It also does Really Bad Things to your liver.

Along the way, we discovered that you can make vanilla extract at home. It involves vanilla beans and vodka, neither of which we keep handy. We’re looking forward to experimenting with it, though.

And just as an example of how amazing the Internet is: we found that recipe on an entire site dedicated to the vanilla bean – varieties, comparisons, recipes, and so on.

I’ll keep you posted on the awesomeness. =)

Vanilla beans photo © 2009 acfou Creative Commons Attribution License