Making an 8-page 7″x4.25″ captioned photo book with Org Mode and LaTeX
Posted: - Modified: | emacs, org, publishing
Here's another technique that makes a simple photo book. I wanted to
make an 8-page book that could be printed 4 pages to a 8.5″x14″ sheet
(duplex, flip along the short edge), with a final page size of
7″x4.25″.
Sample with my own photos:

Prerequisites
- ImageMagick
- Texlive (probably)
- latex-beamer
- Org Mode and Emacs
Links
Process
We can define the labels and their captions in a named table like this:
| Let's Go for a Walk | |
| Caption for photo 1 | placeholder.png |
| Caption for photo 2 | placeholder.png |
| Caption for photo 3 | placeholder.png |
| Caption for photo 4 | placeholder.png |
| Caption for photo 5 | placeholder.png |
Note that the first page is row #1 this time, instead of starting with
the last page.
Then we generate the LaTeX code with some Emacs Lisp, like so:
#+begin_src emacs-lisp :var pages=story :results value latex :exports results
(mapconcat (lambda (row) (format "\\graphicframe{%s}{%s}" (cadr row) (org-export-string-as (car row) 'latex t))) pages "\n")
#+end_src
I put that in a subtree for easier exporting with C-c C-e C-s l b (org-export-dispatch, subtree, LaTeX, Beamer).
Story
Process
- Set up Org Mode export to Beamer
(eval-after-load "ox-latex"
  ;; update the list of LaTeX classes and associated header (encoding, etc.)
  ;; and structure
  '(add-to-list 'org-latex-classes
                `("beamer"
                  ,(concat "\\documentclass[presentation]{beamer}\n"
                           "[DEFAULT-PACKAGES]"
                           "[PACKAGES]"
                           "[EXTRA]\n")
                  ("\\section{%s}" . "\\section*{%s}")
                  ("\\subsection{%s}" . "\\subsection*{%s}")
                  ("\\subsubsection{%s}" . "\\subsubsection*{%s}"))))
- Set up the header.tex
This file gets included in the LaTeX file for the children's book.
Tweak it to change the appearance. In this example, I use black serif
text text on the left side of a picture, both occupying roughly half
of the page. I also experimented with using a different font this time, which you might need to install (for me, I didapt-get install texlive-fonts-extra).\geometry{paperwidth=7in,paperheight=4.25in,left=0.5in,right=0.5in} \beamertemplatenavigationsymbolsempty \usepackage{etoolbox} \usepackage[T1]{fontenc} \usepackage{Alegreya} \usefonttheme{serif} \setbeamercolor{normal text}{fg=black,bg=white} \setbeamercolor{structure}{fg=black,bg=white} %% \setbeamertemplate{frametitle} %% { %% \begin{center} %% \noindent %% \insertframetitle %% \end{center} %% } \newcommand{\graphicframe}[2] { { %% \if #1\empty %% \usebackgroundtemplate{} %% \fi \ifstrempty{#1}{ \begin{frame}[plain] \begin{center} \noindent \textbf{\huge{#2}} \end{center} \end{frame} }{ \begin{frame}[plain] \begin{columns} \begin{column}{0.48\textwidth} \huge{#2} \end{column} \begin{column}{0.48\textwidth} \includegraphics[height=\textheight,width=\textwidth,keepaspectratio=true]{#1} \end{column} \end{columns} \end{frame} } } } \usepackage[noframe]{showframe} \renewcommand{\maketitle}{}
- Create the PDF
pdflatex index.tex
- Create one PNG per page
mkdir pages
convert -density 300 index.pdf -quality 100 pages/page%d.png
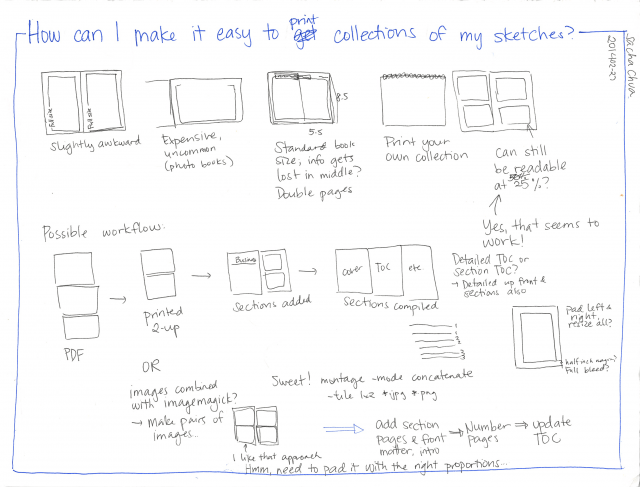
- Create the 4-up imposition
The diagram at https://pressnostress.com/iw/howto/booklets/1.html was helpful.
montage \( page4.png -rotate 180 \) \( page3.png -rotate 180 \) page7.png page0.png -tile 2x2 -mode Concatenate front.png
montage \( page2.png -rotate 180 \) \( page5.png -rotate 180 \) page1.png page6.png -tile 2x2 -mode Concatenate back.png
convert front.png back.png -density 300 ../print.pdf
Other notes
Placeholder image from https://en.wikipedia.org/wiki/File:Portrait_placeholder.png – public domain.


