Here’s an assortment of speech bubbles and thought clouds. They’re great for indicating when someone has said something – and there’s always plenty of talking at presentations, panels, and events.
Click on the image for a larger version. Feel free to print this out (or draw on it on your tablet, if you have one)! =)
Have fun drawing! Check out my other sketchnote lessons, and e-mail or comment if you have any suggestions/requests!
Here are some examples of different lettering styles that you can try. Some of them (like Chisel or Reverse) may be easier to do digitally than on paper. Click on the image to view or download a larger version, and have fun practicising. Enjoy!
I write in print instead of cursive because this is easier to read. Computers seem to be better at understanding printed letters instead of cursive. (I use Evernote to search my notes.) For emphasis, I sometimes use Multiple (draw the same letter twice), or Bold if I can anticipate the need to switch pens.
Got any favourite quick lettering techniques? I’d love to see them! Post links below, or e-mail me at sacha@sachachua.com .
Banners and ribbons are a quick way to emphasize parts of your drawing. Instead of drawing the banner and then trying to fit the text into it, try drawing the text first and then drawing the banner around it. Here’s a step-by-step example.
1. Draw the text with plenty of space around it
2. Draw a box around the text.
3. Add two small triangles below the box.
4. Draw horizontal lines extending beyond the triangle, and another set of lines the same distance from the top of the box.
5. Add a ribbon edge if you want, or use a straight line.
Want to get fancy? Add some shading, add more folds, and so on.
Here are some examples that you can practise with:
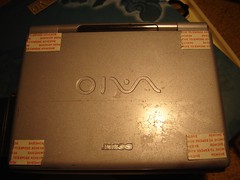
All you need to transform your laptop lid into a reusable surface where you can display your latest doodles are: one photo album with self-adhesive pages, a knife, and double-sided tape. Get a photo album that uses plastic and a sticky(ish) surface. Life is easier and neater if the strip that keeps the plastic attached to the book is on the outside edge. You'll see what I mean.
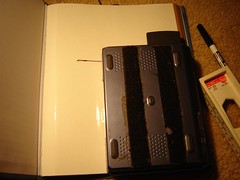
Step 1. Position the laptop face-down on one page of the photo album so that the strip that keeps the plastic attached to the book is along the top edge of the laptop lid. Trace laptop outline onto one page of the photo album. (If you feel particularly diligent, you can measure it instead.)
Step 2. Cut the photo album page to size. Trim a bit off the bottom part to avoid hitting the laptop hinge.
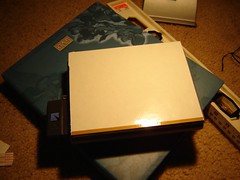
Step 3. Attach double-sided adhesive tape to the laptop.
Step 4. Mount photo album piece on laptop.
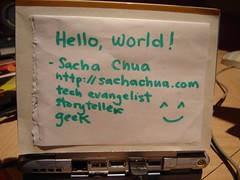
Step 5. Peel back plastic and put in stuff.
I like this approach because it doesn't require me to bring any special supplies in order to add to the display. For example, I can add fortunes from fortune cookies, Post-it notes, or even business cards.
This is handy for my wild idea about selling advertising on my laptop. This laptop hack's primarily about creatively expressing yourself, though. =)
Good stuff.
I came up with a terrific plan B: a whiteboard with a plastic protector to keep it from being erased in one's backpack. That one's pretty cool, too. I'll blog about it more on Sunday, Aug 27. In the meantime… enjoy!