Thinking about the design of my blog
Posted: - Modified: | wordpressI hadn't tinkered with my blog design in a while, since I've been paying attention to other things. Since I'm delegating podcast- and writing-related processes, I thought I'd revisit technical delegation too. Before I can delegate, though, I need to know what I want. I listed a bunch of blog improvements I've been meaning to do for a while.
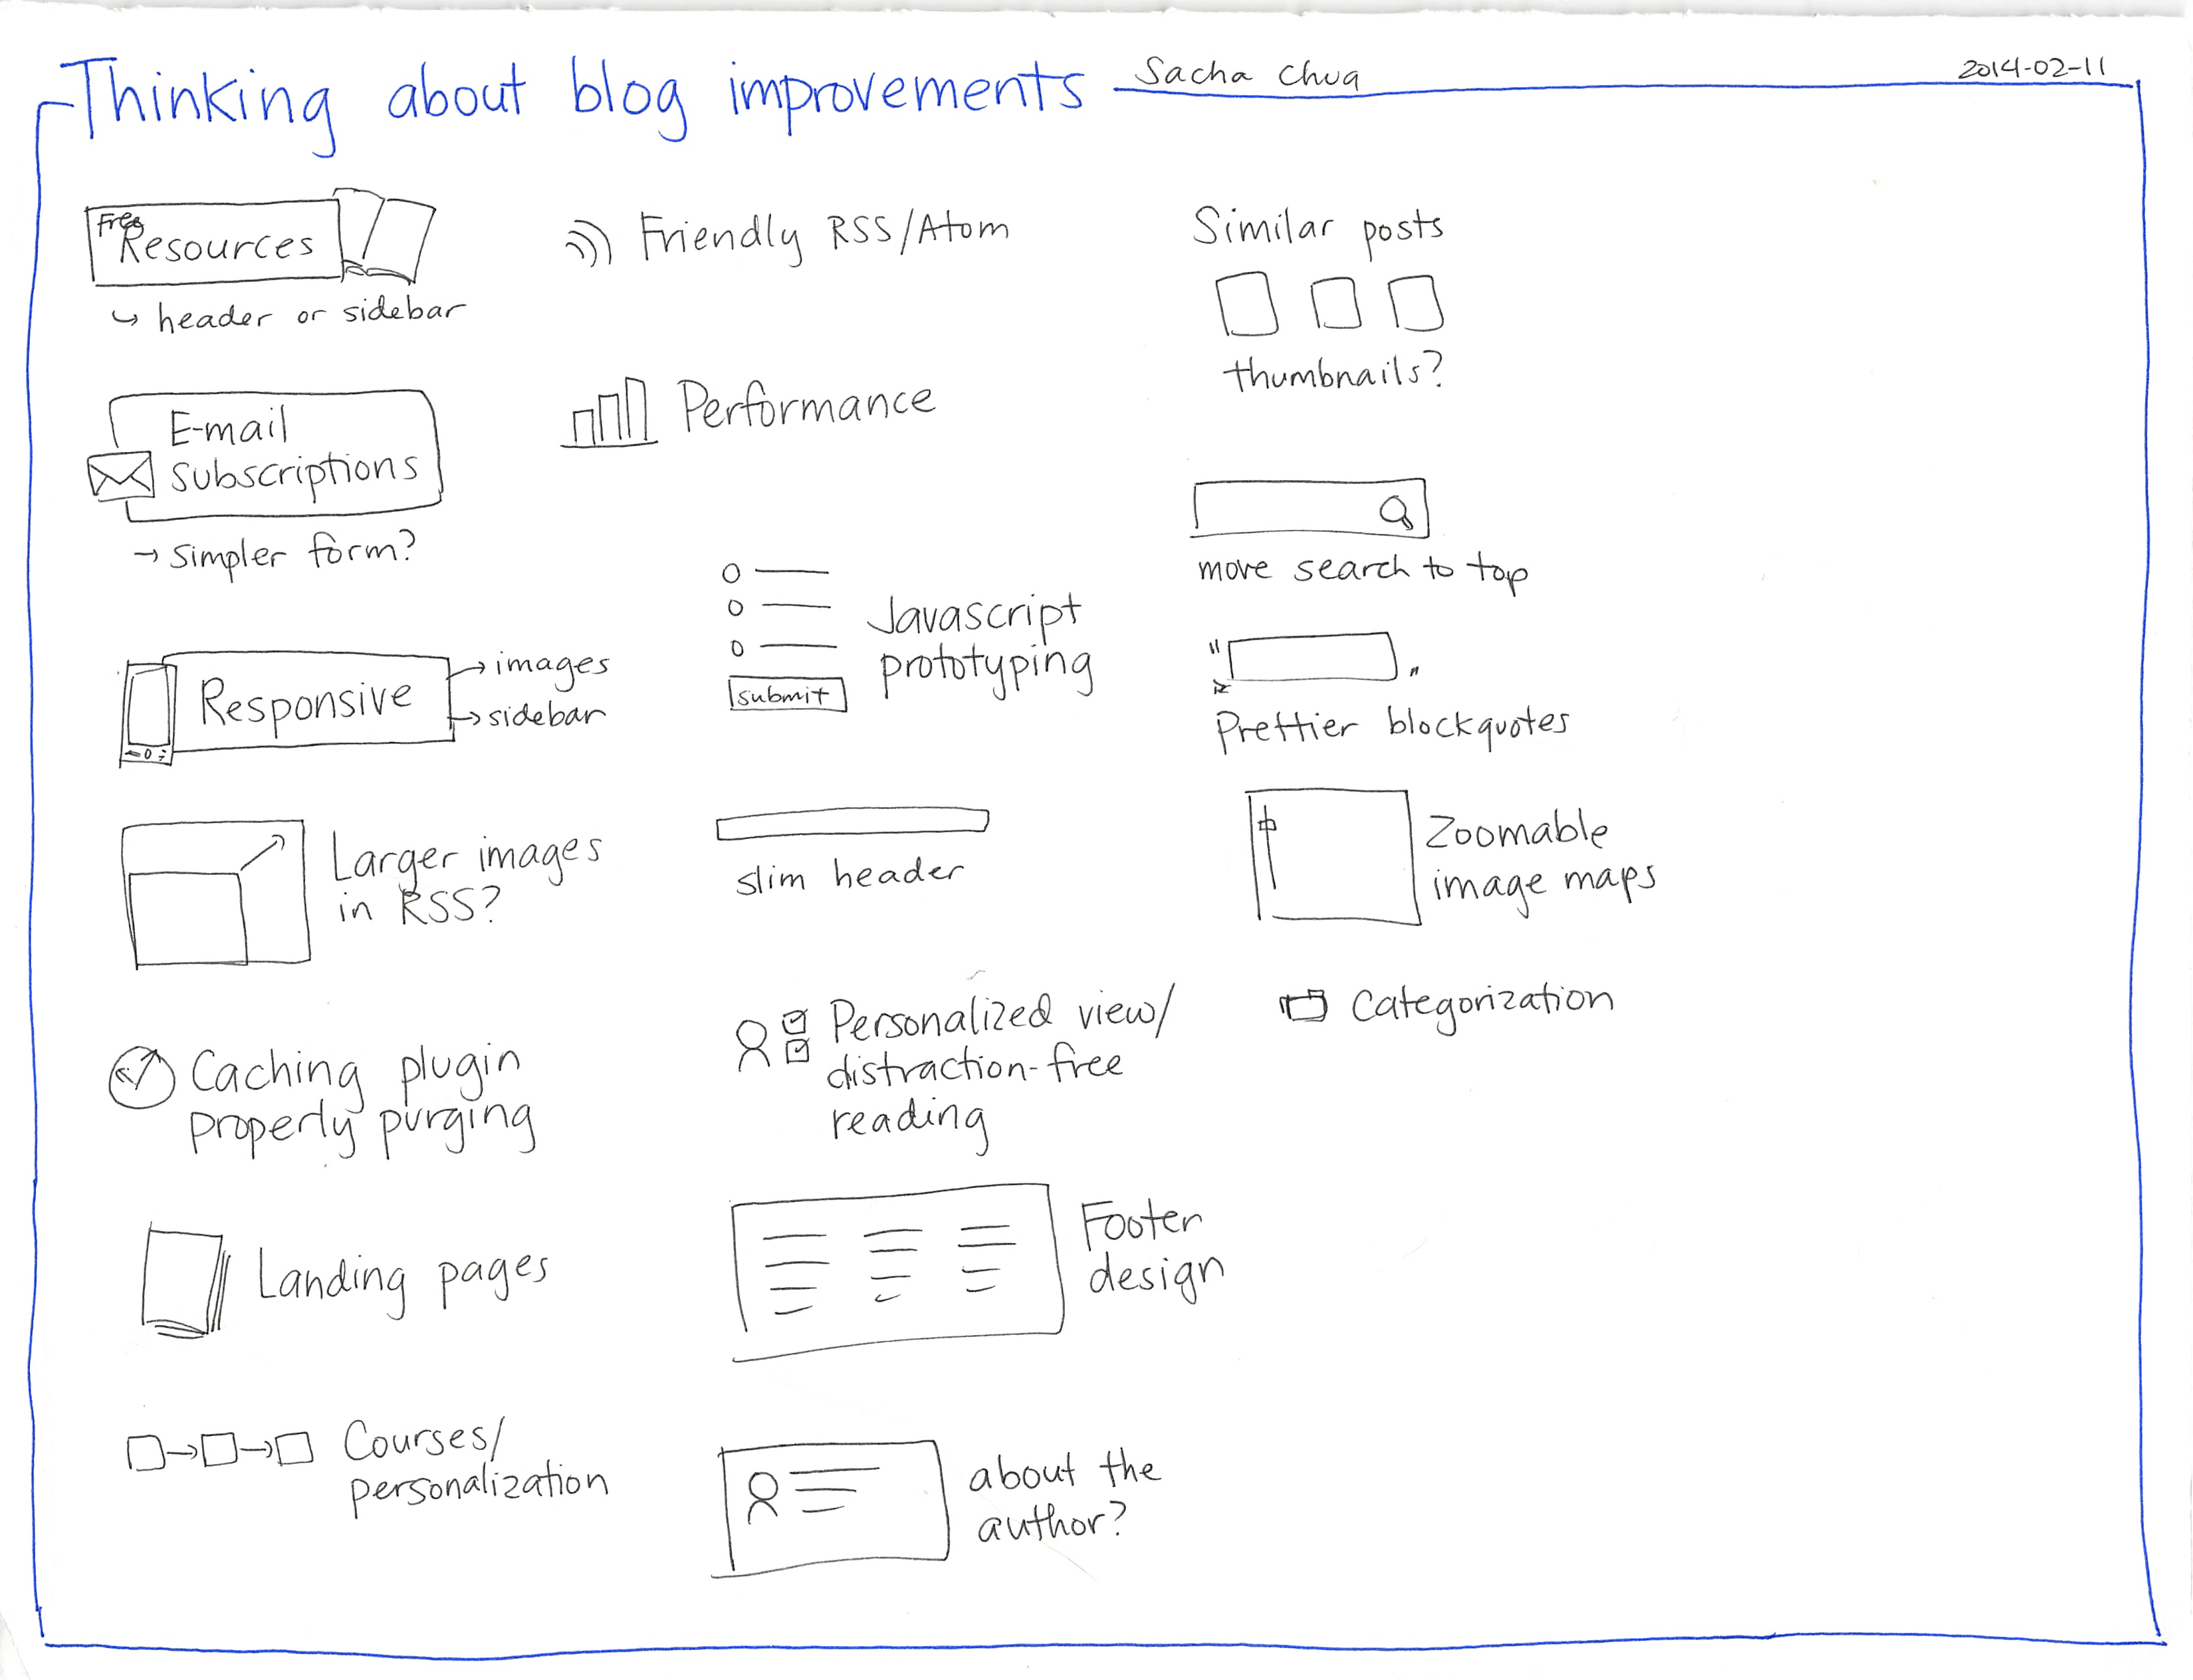
2014-02-11 Thinking about blog improvements
I created a Trello board with the tasks. That way, I can keep track of the tasks as I assign them to people or do the tasks myself. Trello lets me attach files (upload, Google Drive, or Dropbox), which will be handy for sharing designs.
One of the bigger tasks I was thinking about was making my site more responsive. 10% of my visits come from people using mobile devices, many from iPads and iPhones. On computers, it might be interesting to see how I can tweak my site design to make better use of larger screens.
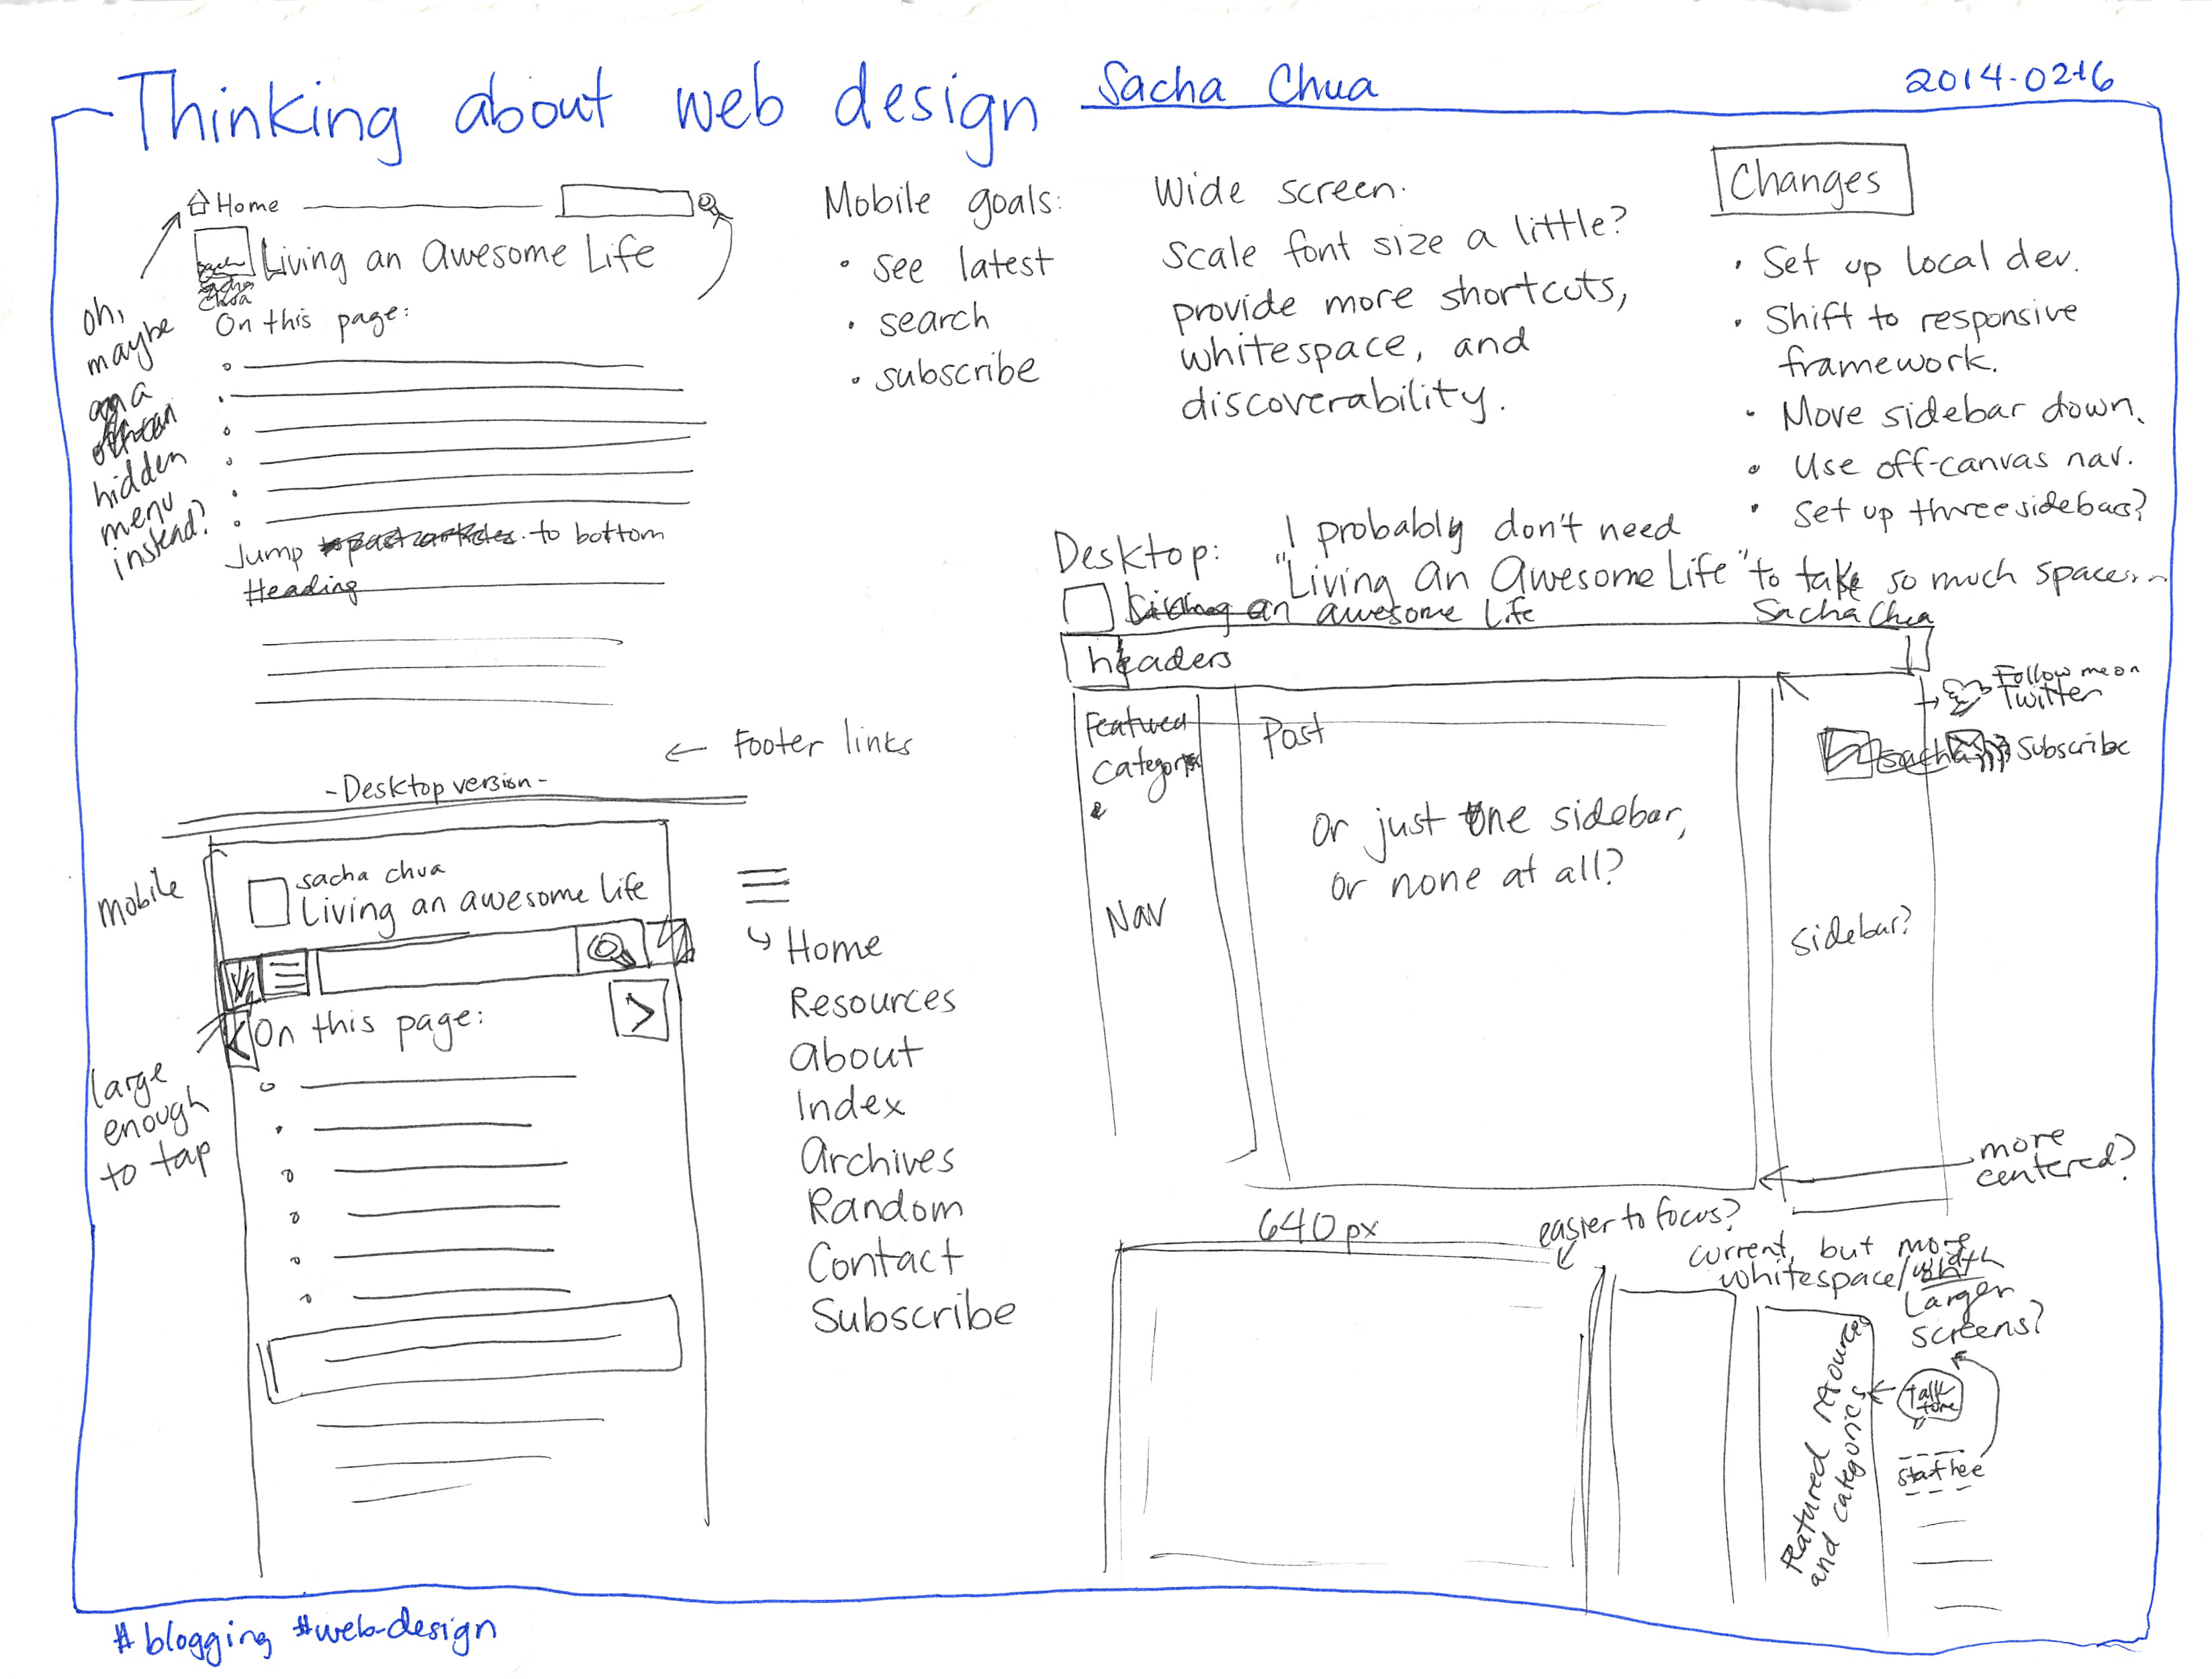
2014-02-16 Thinking about web design #blogging #web-design
For narrow widths, I was thinking of moving the sidebar down, trimming the navigation, and maybe making search more convenient.
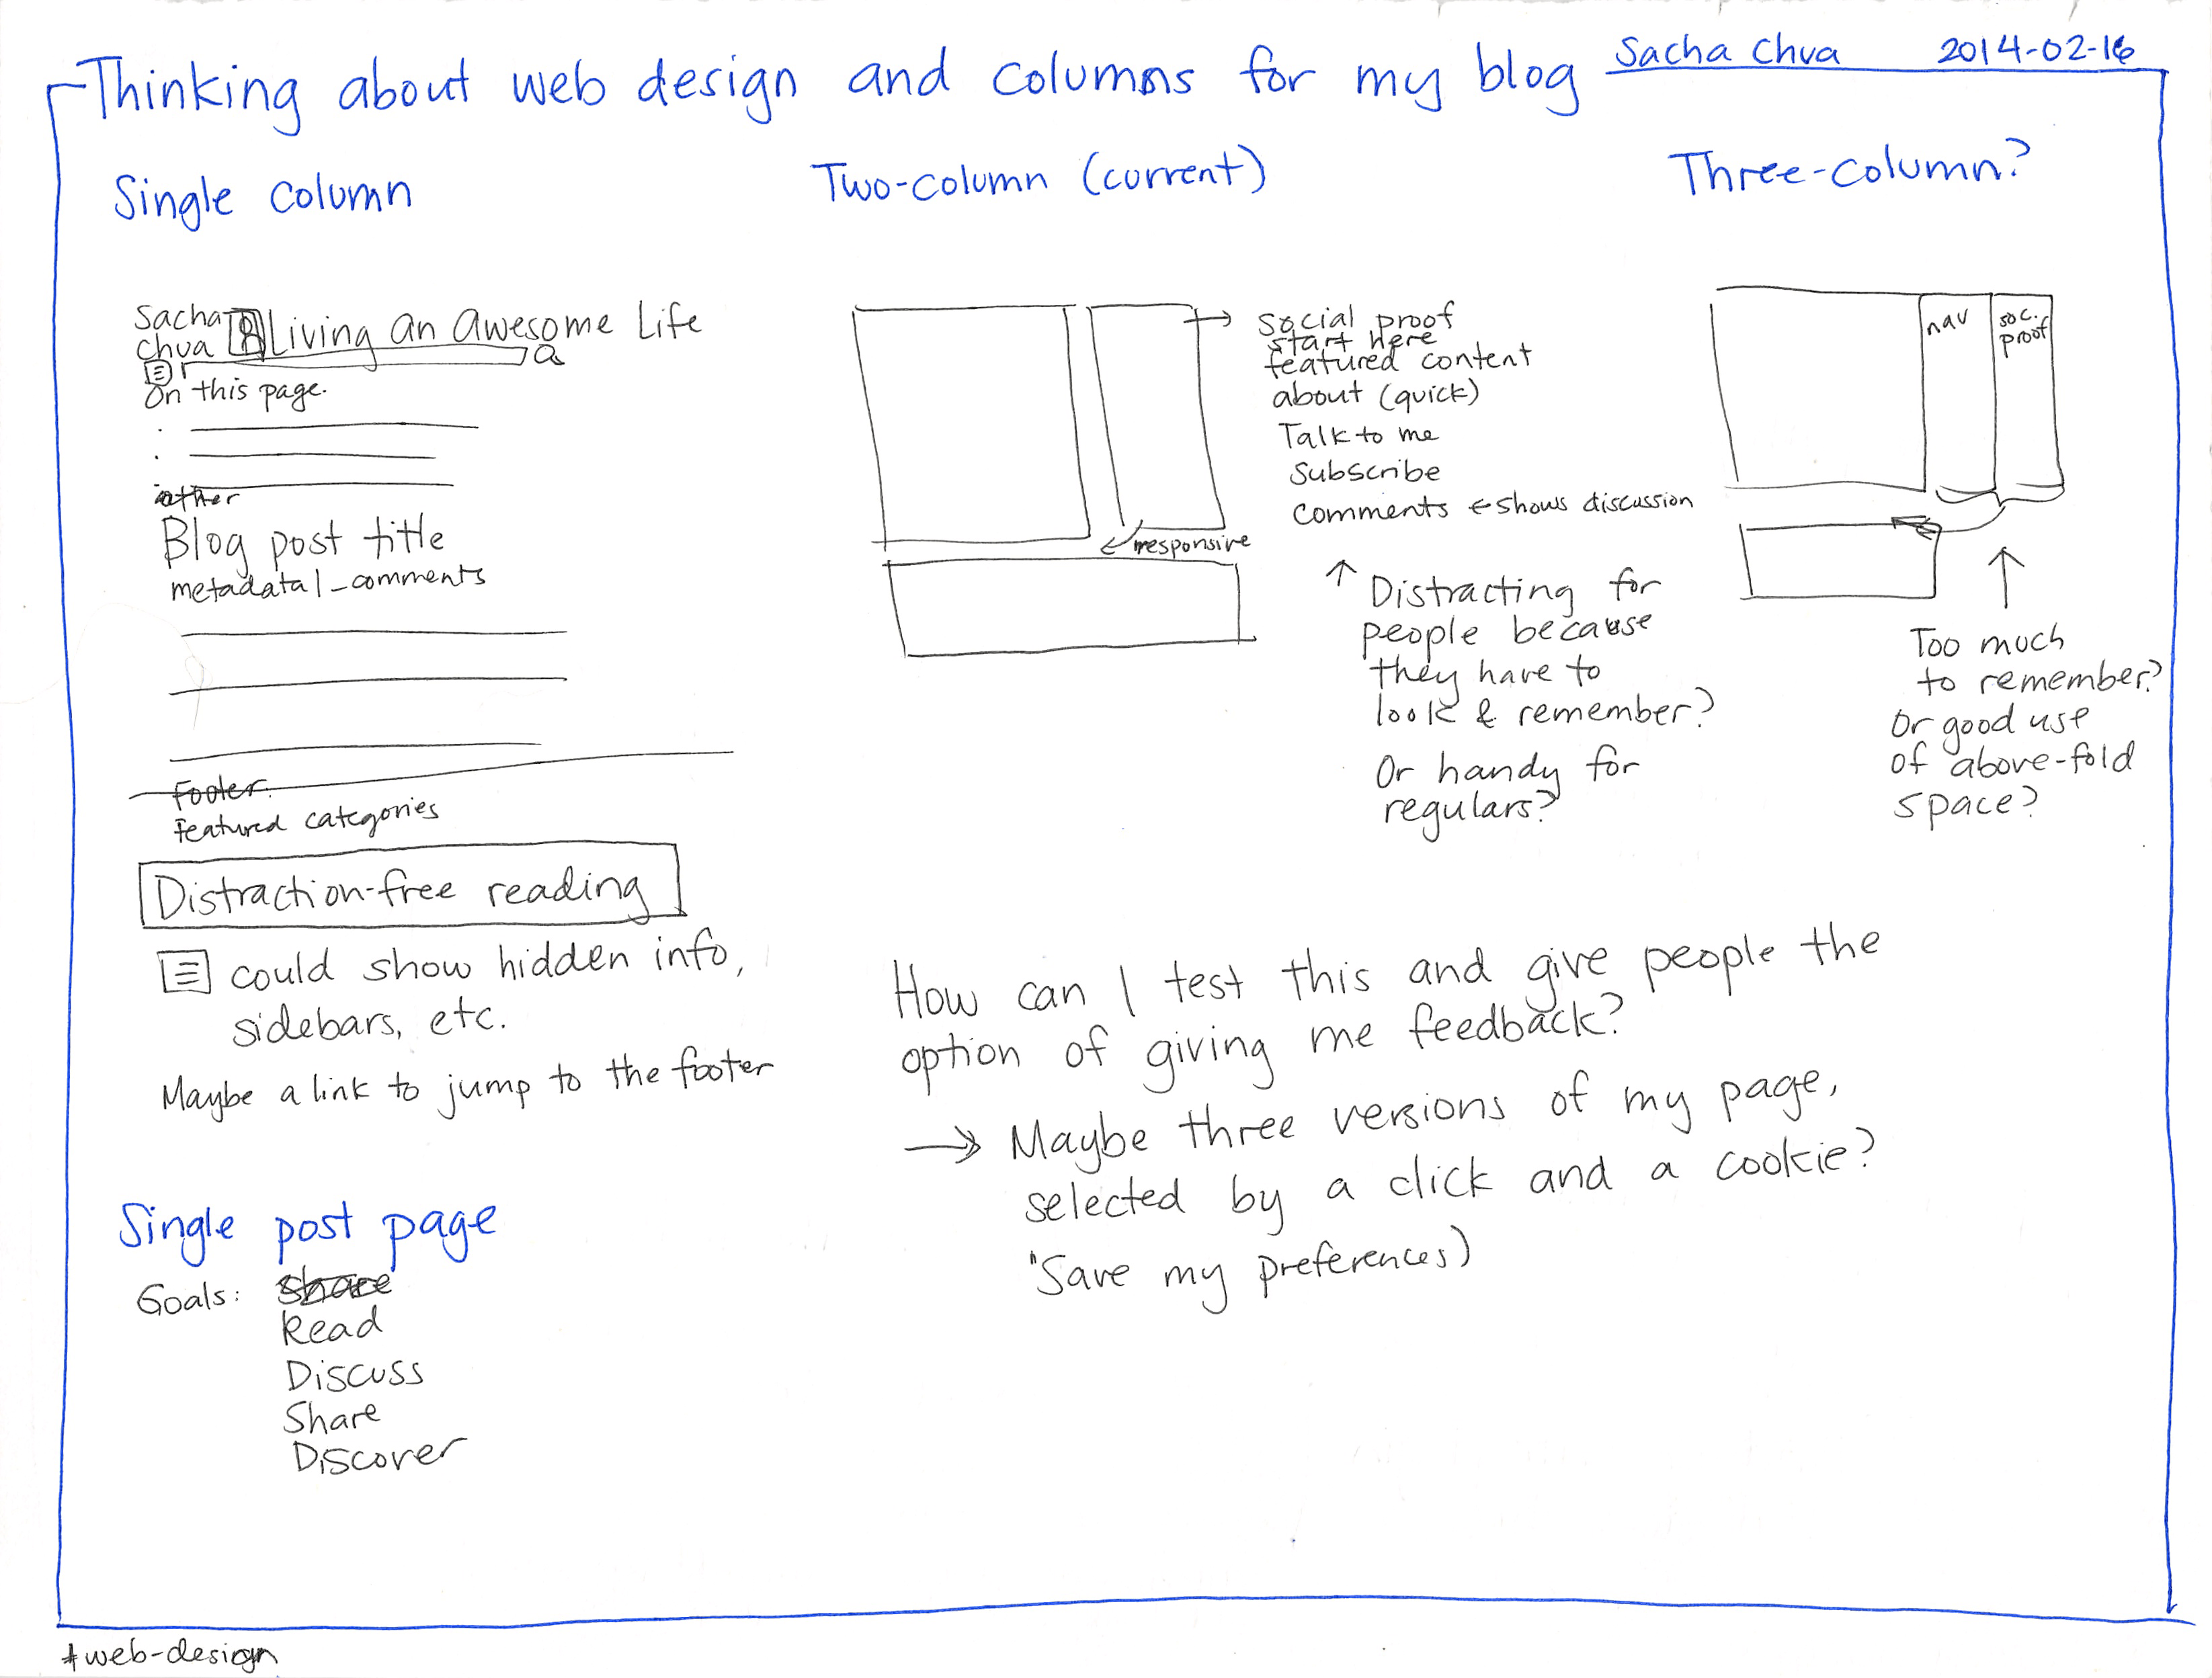
2014-02-16 Thinking about web design and columns for my blog – #web-design
I'll need to sort out a good single-column layout for mobile devices, anyway. Do I want to keep the same distraction-free layout for larger screens, stay with my two-column layout, or add a third column? Hmm… Three columns might be too much. It might be interesting to test one- or two-columns. I'd like to be able to give people the ability to switch to the other style if they prefer. We'll start with what we have, though.

2014-02-16 Thinking about post or page navigation for my blog #web-design #wordpress
I'm also interested in improving the navigation and discoverability of the posts in my archive. @madwilliamflint nudged me to logically arrange my posts, and the Organize Series plugin seems to be a good fit. Organize Series lets me define a series and the order of posts within it. It adds links to the series and the previous/next posts, and it also creates an archive page that lists the posts in order. Neat! See the trails I've defined so far.
I spent 4.5 hours last Monday moving my theme from a 960-grid to Zurb Foundation, which did make it surprisingly easy to make the site responsive. I fiddled with some of the graphics, too. Check out sachachua.com to see what the site looks like now. =) I'm pretty happy with it, although of course there's more to do.
It was great thinking about the things I want to tweak about my blog. Although I'm still thinking about finding someone I can delegate design or development tasks to, having a list of blog tweaks encourages me to tweak the blog myself (which is fun). I had fun setting up the series. I'm looking forward to trying out the other changes – either doing them myself or getting someone to do them.
Thoughts? What would make this site easier to use for you?